Step 1: Accessing Network Preferences
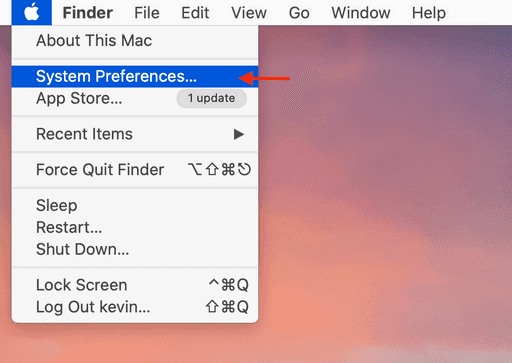
- Locate the Apple logo at the top left corner of your screen and click on it.
- From the dropdown menu, choose "System Preferences".
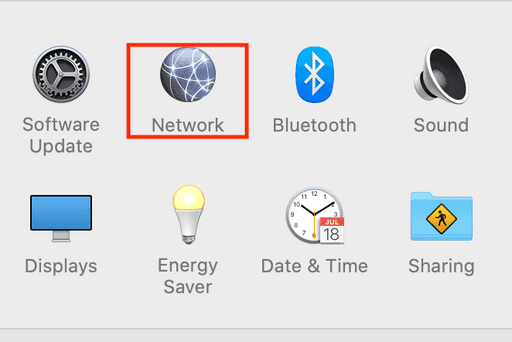
- Proceed by clicking on "Network".
Start by clicking on the Apple menu, situated at the top-left corner of your screen, and select System Preferences.
Next, click on Network.
Step 2: Creating a New VPN Connection
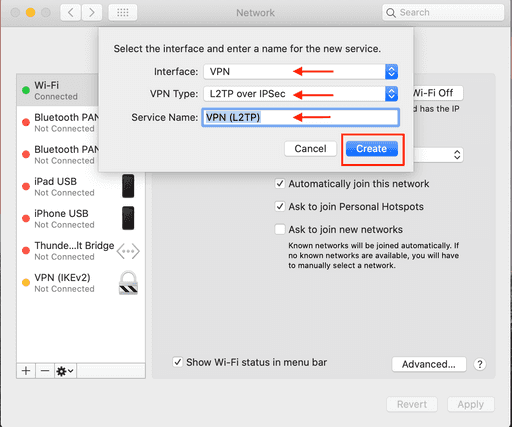
- In the Network window, find the "+" button at the bottom left and click on it.
- From the Interface dropdown menu, opt for "VPN".
- In the VPN Type dropdown menu, choose "L2TP over IPsec".
- Provide a name for your VPN connection in the Service Name field. This can be any name you prefer.
- Conclude by clicking "Create".
In the Network window, click on the + symbol to initiate a new connection.
Then, in the dropdown menu, set the interface to default, select the VPN Type as L2TP Over IPSec, and click on Create.
Step 3: Inputting VPN Server Details
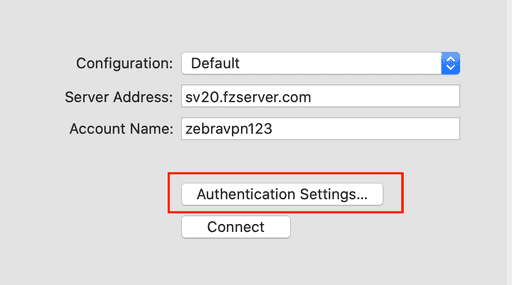
- In the Server Address field, input the address of your VPN server.
- Provide your VPN account username in the Account Name field.
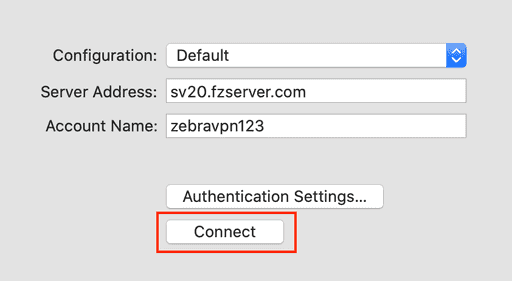
Server Address: Use one of the Zebravpn addresses (available in the client area)
Account Name: Your Zebravpn username. For entering the password and secret, click on the Authentication Setting.
Step 4: Setting Up Authentication
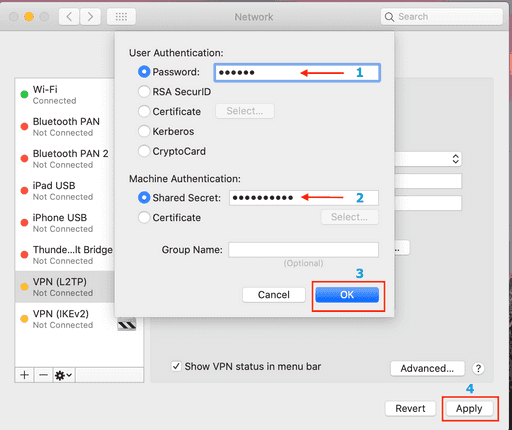
- Click on the "Authentication Settings" button.
- In the Password field, input your VPN account password.
- Provide your VPN's shared secret in the Shared Secret field.
- Conclude by clicking "OK".
Input your password and secret (both can be found in the client area)
To save the information, click on "Apply".
Finally, click on Connect to establish a connection to the server.
Step 5: Adjusting Advanced Settings
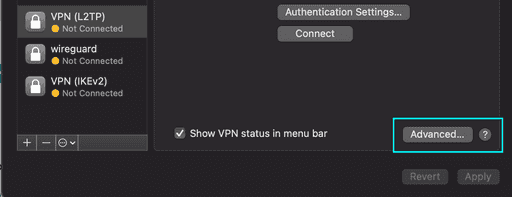
- Click on the "Advanced" button.
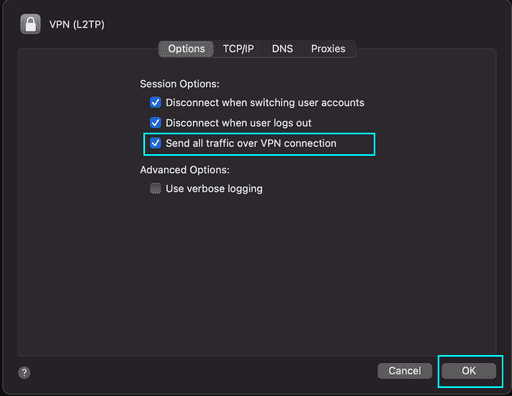
- Check the box labeled "Send all traffic over VPN connection".
- Conclude by clicking "OK".
Step 6: Applying Settings
- Click "Apply" at the bottom right of the Network window to save your settings.
Step 7: Initiating the VPN Connection
- Click "Connect" to activate your VPN connection.
